Monday 28 February 2011

Nailing your Shutter Speed...{plus The Photographer's Workshop Input time Review}


Something I have yet to do!  (Nail my shutter speed that is...)

This week's assignment was all about SHUTTER SPEED - shooting in SHUTTER PRIORITY MODE - something I NEVER do!
Still have last week's assignment to post but we'll get there...

This little man woke up at 5.30 to help me by being my model, how many other kids would do that with a smile & an "of course Mum!" ???
Needless to say his cheeky older brother declined :)  Aaaah the teens.....

Actually I keep forgetting that they are both teens now as this one has just had his birthday!  {Yup that means more photos to follow ;)  }
I am learning absolute HEAPS on this course.  It is really awesome.

Despite the hefty price-tag it is like a gym sub - good value if you really keep going at it & get your money's worth.  Easier said than done when there are other things to do in life as well.
There are a number of absolute beginners on this course, which I would say is fine SO LONG AS YOU HAVE EVEN MORE HEAPS OF TIME TO DEVOTE TO IT.  I have been shooting in semi-manual modes {mostly apperture-priority) for a couple of years now so would say that I was at an intermediate level & my brain is frying at times!!!

It is an absolutely wonderful resource though - there is a forum with more questions & answers than you will ever read {unless you are like me - in which case you WILL eventually read them all - even if it takes you the TWO YEARS that you have from the date your course started)  Yes, you have FULL ACCESS to the forum for 24 months!
Personally I doubt you'll ever learn all this course offers by attending other, less thorough courses on various different topics (I've tried...) so I would suggest "biting the bullet" & just diving in & doing the course if you are really serious about improving your photography.  Sadly there is no other way...

Realistically speaking you will need - on average - a minimum of an hour a day - every day of the week (Mon - Fri) or at least 5 hours a week (split up how you like 'cos usually the lessons are up on a Monday & with assignments being due in end Sunday you can structure your time as you like).
Then you will still have your assignments to read (these are very comprehensive & usually about 4 pages long & broken into 3 parts).

Then of course you will have to complete your assignment - I only get to mine over the weekend as I am NEVER ahead.  A typical shoot takes me an hour & I get about 300 - 500 shots (of which only 5 - 10% are usable/worth-keeping).
This might make me sound really bad LOL but actually that yield is about average!!  Yup - you gotta snap a lot :)

Then you have to upload, NO EDITING ALLOWED (here I have edited a little now that the assignment is in - which BTW only required 3 of these photos), make your selection then fill in the assignment form online (with all your shooting information - camera settings, etc) & submit.
That takes me an hour so you're looking at 7 hours a week absolute minimum.  I don't think it's worth spending so much on a course that you can't do properly.  Late assignments do not get evaluated & that evaluation is important or you'll never know where your weak spots are.  I like to spend at least half an hour a day in the forum/galleries too...reading, learning, commenting & saving photos to my inspiration file, so really, it can take a looooooooooooooong time.  That said, in my opinion my 10 hours a week is absolutely worth it - as exhausted as I am..... .zzzzzzzzzzzzzzzzzzzzzzzzzzzzzzzzzzzzzzzzzzzzzzzzzzzzzzzzzzzzzzzzzzzzzz!!!

Saturday 26 February 2011

Wishing You Sunny Skies Layout


***The Colour Room #45 / Pencil Lines Latest / PASSION challenge over @ BIRD IS THE WORD***
I really wanted to participate again at The Colour Room last week so I managed to get this one done quickly.

I just happened to have received the perfect colour of cardstock in my Studio Calico January kit so that formed my background.  I also had a hand-made embellishment sent to me from Pearl in Singapore, that I still had sitting on the paint tray in front of my desk, waiting to complete the perfect layout.

I also happened to have the perfect paint in the darker mauve shade & my last lovely LYB doily that I knew would be the perfect way to incorporate the white.  The grid paper is Glitz Design that I misted with various complimentary colours from the palette choice, aswell as the back of a Glitz Design card.
I was impatient waiting for the misted paper to dry - which had got quite soggy with all the different colours I had layered on top of each other, so the trimmer was getting snagged up so I just decided to go with it & tear the paper instead.  I recoloured Pearl's handmade embellishment but used it as a STAMPING TOOL before I adhered it to my layout, thus creating the weird shaped little "thingies" emanating from the doily (which I dabbed with a paper towel to create that blotchy effect).

I'm crazy about fonts & typography so was in my element creating this nice long title over here!  Using a selection of thickers (that I don't think one can EVER have enough of!)
I hand-wrote the journaling "and days filled with passion & purpose" on a strip of photo-paper destined for the bin (an offcut after I had printed out my photographs) so it's nice & shiny.  I cut freehand around it for an interesting organic look.

You'll notice that I often convert photos of my husband to black & white.  This is because he suffers from Rosacea so often has a flushed appearance, so his skintone doesn't blend in too well with everyone else!  I happened to have printed this photo in B/W before deciding to use it here, but B/W is also a good idea to use when dealing with these very pale, chalky palettes, as there are no distracting colours in the photograph to clash with the papers & embellishments. 

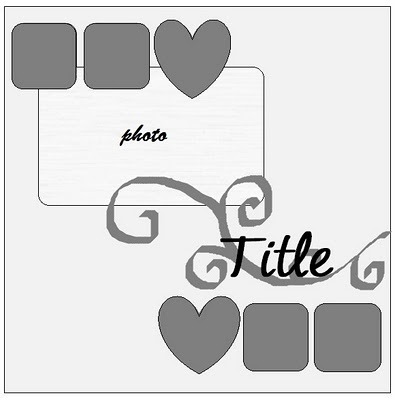
Whenever permissable I combine a colour challenge with a sketch challenge "to kill two birds with one stone" so I based my layout on this Pencil Lines sketch & also managed to tie it in with a word challenge over at "Bird is the Word" that required that I use the word "Passion" somewhere on my layout.

Supplies:-

American Crafts Cardstock & Thickers
Glitz Design grid paper, journaling card & frame stickers
Maya Mists/Tattered Angels Glimmer Mists
Making Memories paint & flocked journaling sticker
Handmade embellishment - Pearl Liu
Hambly Studios Doily transparency stickers
Little Yellow Bicycle mini-doily

Friday 25 February 2011

EVERYDAY ( with you is cause for) CELEBRATION (Colour Combos Galore Combo 180)/ Scrapbook Challenges Sketch 242 PLUS *Glimmer misting tips*


*** Incl. lot of misting tips too***

Phew, all of a sudden I have tonnes to blog about!  I have another 2 layouts to show you (not including this one), an impromptu photoshoot when the Vervet monkeys came to visit & my son's 13th birthday story/photos to blog about too - not to mention a photo series I've been experimenting with lately using cellphone shots (kinda have their own charm in an unfoccused sorta way!)  Ooops, and I also have my first set of assignments to share with you from The Photographer's Workshop I am attending, plus some awesome links to camera bags, so yeah it's all happening baby!!


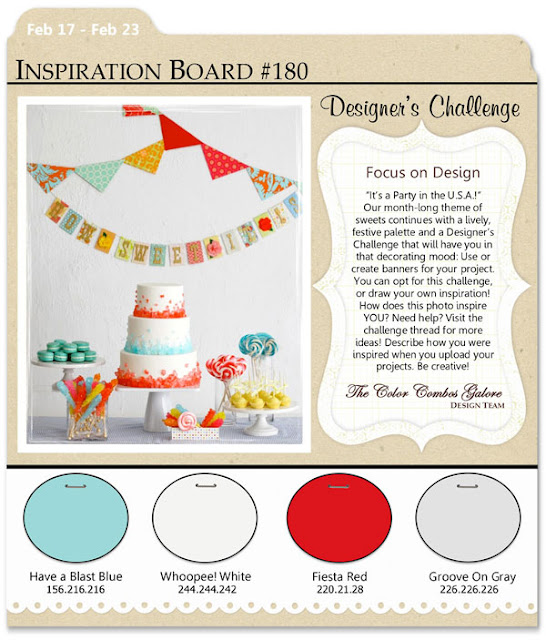
I really try to get Colour Combos Galore & The Colour Room challenges completed every week.  I find them simple to remember because CCG is due in every Wednesday & TCR is due in every Thursday.  I just find colour inspiring, and easy.  Being restricted in terms of what you can use on a page is actually very freeing as it gives you an opportunity to really focus on the design aspect of the layout without getting side-tracked.  I also love the little "twist" that CCG adds each week - The Designer's Challenge - in this case to incorporate banners into your layout.

SUPPLIES:-  Printed paper - My Mind's Eye "Fine & Dandy" Tickled Pink 'Radiant' paper
Bazzill Swiss Dot
Maya Mists - Rose Tea & Blue Hydrangea
Ranger Perfect Pearls Mist (Perfect Pearl)
Colourbox Ink - Red
Banner uses paper offcuts from KI Memories,  Sassafras Lass & others
White embroidery thread
Sentiment from GCD Artsy Urban die-cut borders
Webster's Pages Sparklers
Prima Diamante/Pearl Bling
Pink Paislee Sweetness Heart badge
Jenni Bowlin pearl stick-pins
Making Memories Vintage Findings & tiny alphas
Vintaj butterfly & bird
Crate Paper restoration 3D chipboard
Glitz Design Maya Glitzers (stickers)
Bo Bunny bling
Pink Paislee 'Fascinating" alphas

I combined this colour challenge with the weekly sketch over at Scrapbook Inspirations where I have my Design Team gig going on until the end of June.  There is always plenty of action on that site & lots of friendly fellow crafters leaving words of encouragement.  If you are ever in need of inspiration go into their forum & click on "Sketches" or "Designer Challenges" to see what I and all the other DT girls there get up to.  Nice prizes too make it even more worthwhile. 
I am determined to make regular use of my glimmer mists, which is why you may have noticed they are on almost every layout!  Initially I'll admit I was skeptical about whether they would take off but they have indeed, with many more companies than Tattered Angels jumping onto the bandwagon, in fact I will go so far as saying that personally I think the glimmer mist trend has heralded a return to artsy techniques on layouts as I have noticed a lot more "painterly" effects on layouts of late (& jumped on the wagon as I do...)

My tip for anyone out there skeptical as I was is "make a small investment" & give Glimmer Mists a go.  I started out with 3 bottles & now I have 2 dozen (yup, even I gulped at that - had NO idea - things breed in this studio I'm telling you!)  Keep aside a clean pizza box or a USPS 13 x 14 x 4 box (the one your kit arrives in every month!) & use that as a "spray box" to contain the overspill.  Honestly, mists are the LEAST messy art supply you could own, with almost zero clean up.
I often don't bother with the box any more, opting rather for plastic grocery bags, quickly slicing one open at the side & spreading it underneath & beyond (behind) my layout.  I prefer it because 1) it's quicker to grab the bag, 2) the bag is "wipe-clean", the left-over mist doesn't get absorbed into the box but stays on top of the plastic & 3) I use up every last drop for colouring flowers, trim etc (because the plastic is totally non-absorbent) so there is very little clean up by the time I have "mopped up all the juices" on the plastic bag.  I just grab a wet-wipe (I always keep a packet on my counter top) wipe the bag clean, fold & put away.  60 seconds tops...
4)  I like the LOOK of misting when it is a FINE spray & that look is best achieved when you OVER-SHOOT your paper.  5)  I can hold the mist more upright & at a lower lever & better angle if I don't have the side of the box to take into consideration.  So there you go, my top 5 reasons for glimmer misting the way I do - onto plastic, NOT IN A BOX, for a no mess, practically zero clean-up artsy experience.   

Are you up for it?  I hope so!

Another trick is to look for any potential "masks" (stencils) around the house.  The one above is NOT an expensive Heidi Swapp House of 3 Designer glimmer mask.  NOPE.  It's the egg tray from the side of the fridge....bwahahaha!!!  And no-one is any the wiser 'cos I washed it up & stuck it back in before breakfast :)

Happy weekend People!


Wednesday 23 February 2011

In Love...

Right now I don't have anything scrappy to share, not yet, soon I hope!

It's been a busy week & I am IMMERSED, body, mind, soul, it's all here right now...I knew I was infatuated but I had no idea it was going to grow into this.  I have tried to stop it, STILL try to stop it, and sometimes I succeed & sometimes I just let it flow.  It's just so important to me & at times it's beyond my control.  Something that you either understand or you don't.  There's no explaining -  the results speak for themselves.

So inspired.  So aspirational.  I want it.  I want to do it.  Be it.  Live it.  It is beauty, wonderfulness, appreciation of the world.  My life, our lives, our planet.  It's vital.  And so worthwhile.  My love for photography has taken me by surprise.  My desire for focus, perfection, heart, dynamics.  I want to capture it, convey it, share it.  Succeed in taking glorious images that tell my story.  It's a long road & not for the faint hearted.  It's an expensive journey & not for those unwilling to sacrifice.


Jasmine Star - Love your story from Anton Lorimer on Vimeo.

I am onboard & prepared.  I cannot give it everything but it has my allegiance.  I know I won't get there quickly but I know I will  get there.  Maybe not this far but far enough to be proud.   As long as I am always growing, never static, always moving forward & not backwards, that will be enough.
"I am seeking.  I am striving.  I am in it with all of my heart"  Van Gogh

Saturday 19 February 2011

Meeting Joshua {5 Minute Photo Shoot}


Just popping in here to wish you all a Happy Weekend!  I hope you get to do whatever it is you want to do, that you don't have time for during the week!!  My, but doesn't the time just seem to be flying this year?  I swear it gets faster each year - not quite sure how that works LOL...

These are a few photos taken from a 5 minute shoot I did in January, in Johannesburg, on our way back from Zambia.  Joshua is the latest addition to the family & isn't he a cutie!?  I have decided to start working on a Picasa tutorial for you all, 'cos you ALL know what a huge fan I am!  Expect that pretty soon.
This weekend I have a tonne of work to do for my photography course so that is a little daunting.  I have to hand in my first assignment on Monday.  Luckily I get an extra 6 hours, which is one advantage of living in Africa when you do a US online course :)

You may find this hard to believe but I do not have very co-operative photo subjects AT ALL.  Admittedly they have stopped putting their hands up in front of the camera but that is all...so all I can do is regularly "surprise" them with impromptu photo-shoots!
This one took place as we were leaving Johannesburg and heading back to Durban by road.  As we are never the earliest of risers the sun was quite well overhead by the time we left but luckily there was a nice big tree in the garden that I shoved the kids under so as to avoid harsh shadows on their faces.

This little man took an instant liking to my daughter Chelsea - which bodes well for her future as a mommy!  {in the FUTURE lol}.  He started head-butting her for some strange reason!  Thank goodness for digital photography where you can just click away almost continuously to capture these fleeting moments.
I always have my Tamron AF28 - 75mm F/2.8 Macro lens attached to my Nikon D5000, for every day use.  I cannot recommend this lens highly enough.  In my opinion it is superb & I have noted that it is a very popular lens indeed with other scrapbookers/photographers whose interest is mainly impromptu "candid" photography.

Obviously the lens did not come with the camera or it would be a Nikon lens.  I bought the camera BODY ONLY & the lens separately.  I did this because I already have the 3.5 - 5.6 kit lens (that comes with the camera) as I got that one with my D40 some years ago.  If you are interested in a very shallow depth of field, as I am (sharp focus at the front & bokeh blur at the back) the 2.8 is obviously far superior to the 3.5.
I'm cropping less & less these days as I am improving a lot on my SOOC (straight out of the camera) shots.  This is what I've been striving for for years now as of course it cuts down on editing time!  I shoot on A mode (Apperture Priority) almost all the time & keep the f stop down at 2.8 & only up it if that is too bright, so that I can get the background blur that I love.

Okay little lesson over.  Hope that tidbit helped someone out there in the universe :)  Blog Love xoxo

Thursday 17 February 2011

February RAK {The Good Old Days} Double-Points Day Today Only!

***By double-points I mean that anyone who comments on this blog post TODAY by midnight EST (providing they are also a follower) has double-the-chance of winning this RAK because I will enter your name TWICE - comprende?!**

If you are over-stashed, like me, you can still enter & if you win I can send the kit to a different postal address as a surprise for a friend - anywhere in the world :)

I had such fun putting this give-away together that it got me thinking maybe I would make up some kits...What do you think??  Anyone be interested in purchasing them if the price was right? (locals only probably as postage costs would be prohibitive for internationals - bearing in mind that most of this is older stash...)

I am loving sharing my excess with my followers!  I called this one "The Good Old Days"  Most of the stuff is home-themed, with lots of metal, vintage findings & blues & yellow/oranges....
There's a wack of stuff in this one - these gorgeous floral buttons, assorted metal brads (spirals, hearts, etc), 3D floral swirly stickers, epoxy sentiments, home-themed stickers...metal dragonflies, coins & vintage findings of all descriptions...

A brand new Creative Memories concertina photo holder, 7 Gypsies stickers, Vintage Scenic Route sentiments, mini-papers....
A My Mind's Eye title card, Maya Road tiny ticket album (chipboard), frames, Making Memories metal words & Karen Foster metal/resin embellishments.

Lots of interesting bits & bobs here...stars, buttons, buckles, metal filigree embellies, wax seals...
Yummo!  Makes me wanna keep the stuff :)

Ribbon, hearts, numbers, metal butterflies, corners, filigree squares, bingo cards, giant playing cards, mini playing cards, a whole sheet of journaling stickers....phew...and even a brand new roll of film to pull out & use on your layouts T!m Holtz style :)
Okay so I admit I got a little carried away taking photos & all...

Have camera - will snap...
I've pledged to have a give-away each month all year long.  High time I purged my stash as I'm into year 7 of scrapping now & have a much firmer idea these days of what my style is & what I love to use on my pages.

Isn't that focus splendid?  Ooops, sorry, I digress...

Yeah, so, you know the drill...

Leave me a comment (become a follower first if you aren't one already) then wait & see!  All things being equal I will draw my February winner in a week.  Entries close midnight EST on Thursday 24th February.

Internationals welcome.  Come One Come All.

Wednesday 16 February 2011

Live Large {CCG/Get Picky} & January RAK winner!


Yes I know I was meant to draw the RAK aaaaaages ago & no, I haven't forgotten!  Those who played along are:-  Diana (The {no longer so} Lonely Scrapbooker! (JA), Vicki (NZ), Mel (aussiescrapper AUS), Stefanie (CT), Kirsty Vittetoe (US), Chantal (SA), Tania(SA), Briana Johnson (US), Jessy (MLY), Bente, Nicole, Heidi (NZ), Lynette (SA), Cindy Lee (Singapore), Pearl (Singapore) & Sonya (NZ) - 16 ladies!

And the winner is..................................................................Kirsty!!!  Congrats sweetie - hope this makes your day!  Please e mail me your postal address so I can get your goodies out to you.

COME BACK TOMORROW FOR MY FEBRUARY RAK {photographed & all ready to launch} As I said in January, I will be having a monthly giveaway here on my blog {for followers only} & everyone has an equal chance of winning - locals & internationals alike - EXCEPT anyone who has already won from me before, as this year I am trying to give everyone a fair chance!    

 This beautiful binder arrived in the post yesterday - by the end of my course it's gonna be chockablock FULL of my printed PDF notes.  How beautiful is it?!

 So far my course is pretty heavy going & I am having to devote large chunks of time to it but there are no shortcuts to anywhere worth going are there??
Was suffering some serious scrapping withdrawals yesterday so got 3 layouts scrapped while the boys watched UEFA Champions League {Tottenham Hotspur/AC Milan}.  Playing along at Colour Combos Galore this week {due in tonight} & Get Picky (due in end of next week).

Colour challenges are a great way to use up stash, irrespective of it's trendiness.
I had to turn the sketch on it's side due to the orientation of my photos.

Title LIVE LARGE - Journaling "Reach for the stars - be who you want to be"  Going for a more powerful look with my misting these days - want the splatters whereas before I wanted a fine spray...
Supplies:-  Bazill cardstock WHITE, Printed Paper - Kaisercraft - Love Notes (Adore)
Maya Mist {Raspberry Pink - from January 2011 Studio Calico Kit}, red Colourbox Ink, red embroidery thread
Jenni Bowlin Studios - Bingo Card  & mini-numerals
Pink Paislee Artisan Elements [ornaments} & silver rub-ons {Vintage moon metallic silver press-ons}
Pink Paislee Borderlines sticker   
Pink Paislee 365 Degrees chipboard shape
My Minds' Eye Lost & Found [Portobello Road - You & Me} buttons (January 2011 Studio Calico Kit}
October Afternoon Mini Market alphas
Making Memories mini-alphas
Creative Memories tiny alphas 
American Crafts {Dear Lizzy - Merry} Foam Thickers
It took me 4 hours to do 3 layouts yesterday - record-time for me.  My OLW for 2011 - FOCUS - has morphed into PRIORITISE as I've seen that focussing is pretty undefinable for me as I am constantly split in all directions (if that makes sense to you).
So while I am continually conscious of focussing on the task at hand, I have come to realise that, in order to do that, I need to PRIORITISE, which has helped me a lot.  Ground-breaking stuff for me really, for example - yesterday I would have normally spent the evening tidying up my studio, but, because of my OLW FOCUS {PRIORITISE} I compromised - did a quick tidy-up & got going. 

While a picture perfect studio would be my ideal, at the end of the day it's what I produce that counts, not how my studio looks & the tidy police aren't going to come knocking on my door to fine me!  So here's to letting go of the unachievable & focussing on GETTING THINGS DONE.  Amen.